Nesting & Blanking
Often, obtaining the definition of the blank is not the end of the blanking workflow. Depending on the manufacturing process the engineer has in mind, they need to think about how they will cut the blanks out from a roll of sheet metal.
They may also elect to use simpler shapes such as rectangles and trapezoids and worry about trimming later. Whichever way they choose, there is going to be scrap metal that is either left in the roll or trimmed away.
The more efficiently material can be used, the less material is scrapped, which results in a higher profit margin. If you can save a mere ten cents of material per part on a production line that produces a million parts, you will save a hundred thousand in material costs.
How can Dynaform help?
In the previous entry of this blog post series, we unfolded a part geometry using Dynaform, analyzed it for early feasibility, and generated a quick report.
In this blog post, we will continue the blanking workflow and produce viable nesting & blanking scenarios using Dynaform.
Transfer Die Nesting Options
From forming blanks to drawing blanks, Dynaform has the flexibility to generate the nesting concepts an engineer has in mind.
Simply define the length, width, and lead feed scrap to select the best nesting option.
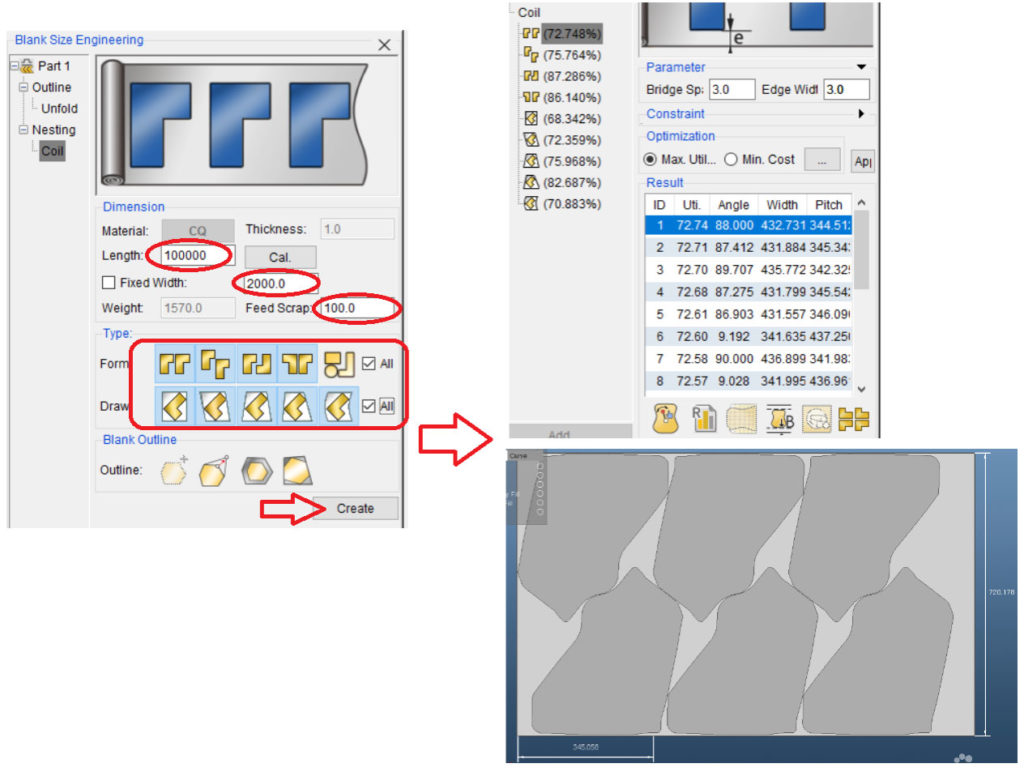
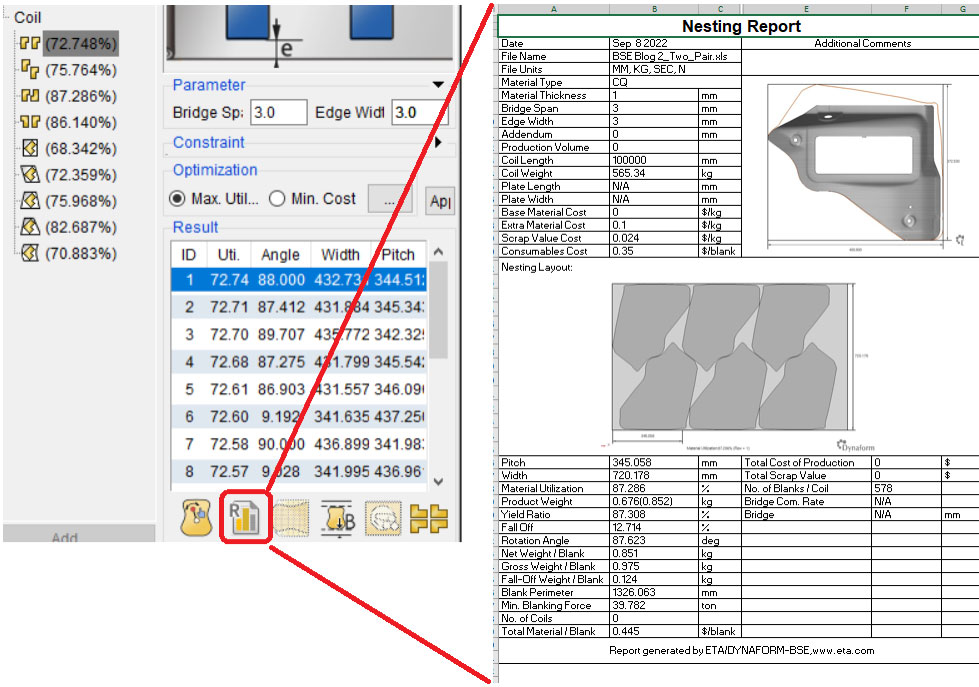
You can also generate a MS Excel nesting report for an outlook of the nesting concept’s properties.
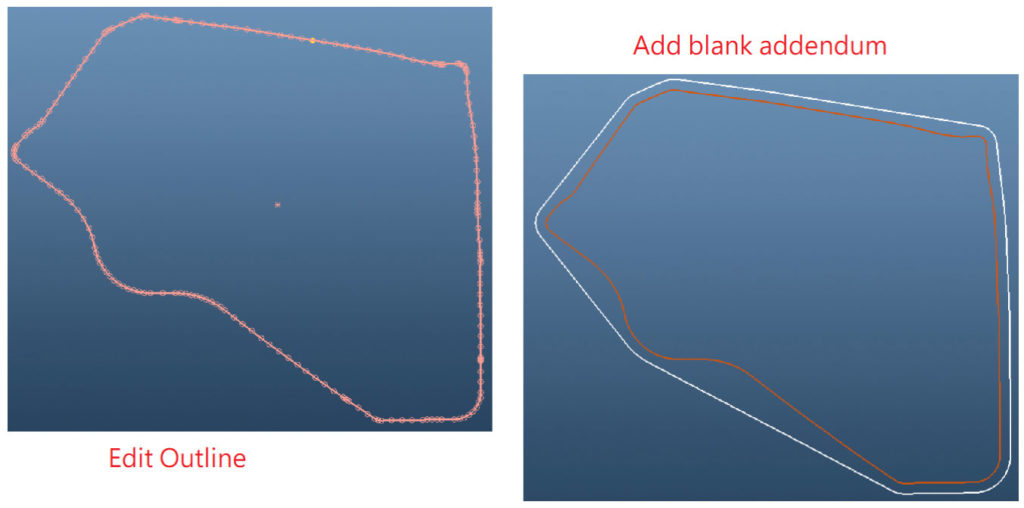
If the blank comes out not the way you desire, there are a few options to edit the blank outline. You can manually edit the outline of the blank or add blank addendum to allow for binder and/or drawbeads for later.
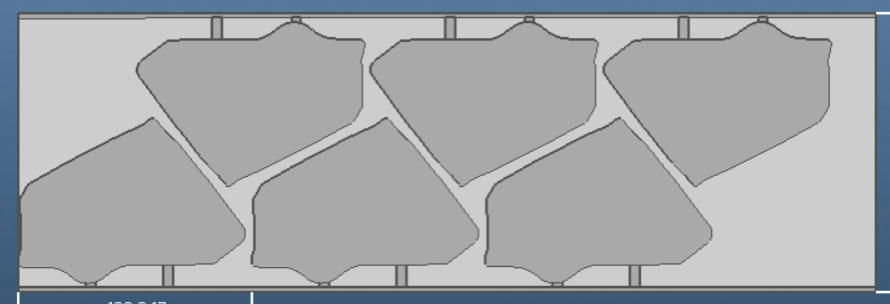
Progressive Die Strip Concept
If an engineer wants to explore the option to produce their part in a progressive-die strip concept, they have the option to do so as well. While the type of process may be different, the workflow within Dynaform is the same.
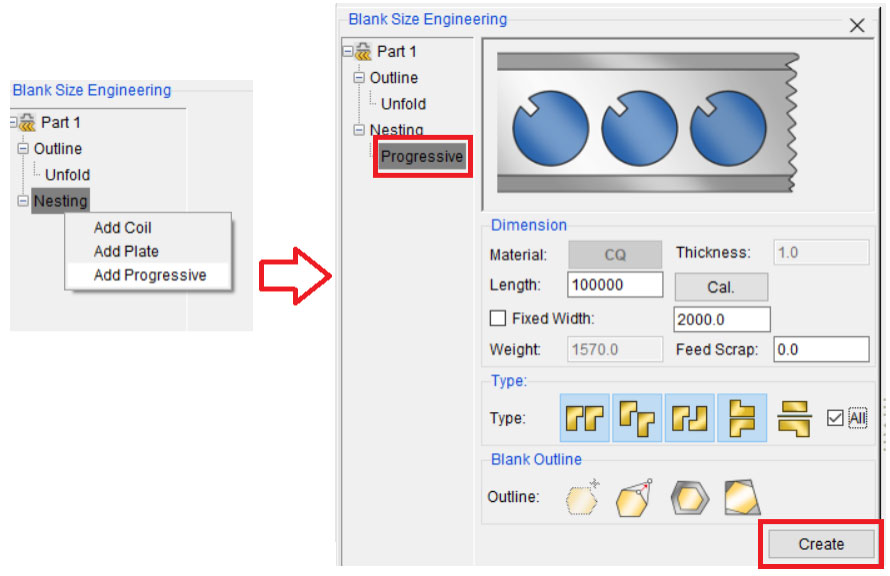
Simply choose the option, define the roll parameters, choose the type of layout, and create the initial concept.

After a few minutes of altering the parameters of the strip concept and some manual adjustments, the strip concept now looks like this:
After the strip concept is complete, you can run a report and export the result of the strip concept with ease.
The quick and intuitive nesting and strip concept capabilities allow the users to quote their jobs with a glimpse of the process they have in mind. It not only makes quoting easier and more accurate, but it can also help users consistently secure their profitability on each project.